One of the most important parts of our original LED lighting design was size. While we were purchasing small LEDs, they all came pre-sldered to large PCBs (Printed Circuit Boards) to allow for ample surface area for heat-sinking. After choosing to use the these high-power IR LEDs from LED Engin, but they're not available from any distributor until the end of the summer. Because of our time constraint we decided to use the same LEDs, but to purchase the ones already mounted to a PCB and unsolder them. Using the schematics we designed this PCB in Eagle (PCB CAD software):
 |
| Eagle Design |
After designing the PCB we used OSH Park to fabricate them. The turn around time is about 12 days and the quality is decent. Below is an image of what the top side of the finished PCB looks like:
 |
| OSH Park PCB |
Because we still wanted to use our custom PCBs and the 12.4V 10 Watt LED Engin LEDs, we needed to unsolder the LED from the manufacters PCB. We used a toaster oven to unsolder the LEDs. Below is our toaster oven:
 |
| Toaster Oven |
The unsoldering process took longer than expected because of the high temp solder the manufacturers used on the PCB. This meant we had to max out the oven for 5+ minutes to unsolder the lights. Although this was longer than we wanted, we ran with it. After unsoldering the LEDs we then used a Bismuth based solder from Digikey. This stuff is AWESOME and worked extremely well for us. It's perfect for LEDs surface mount soldering because the entire oven never has to get above ~150C – over 100C below the max temperature rating on the LED.
Below is a picture of the different stages of the LED process. On the left is the original LED/PCB combo. In the middle is the LED unsoldered from the PCB. On the right is LED soldered onto our custom PCB.
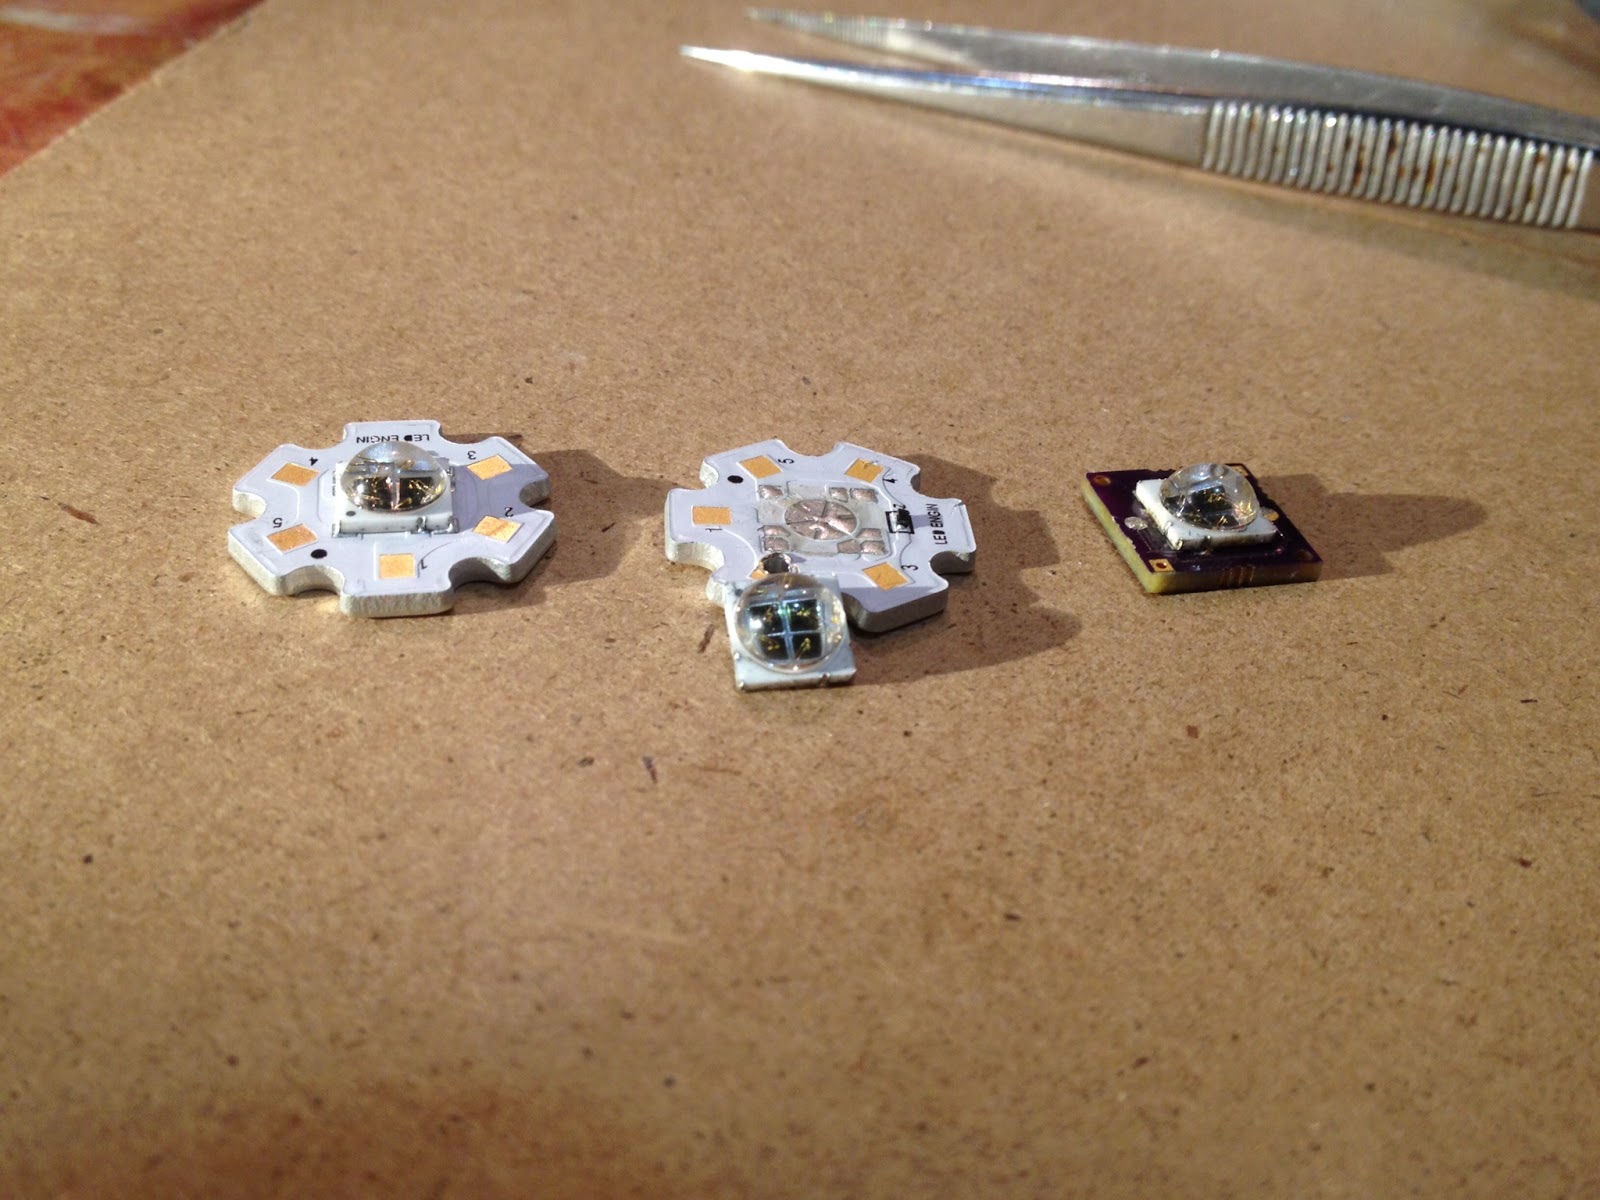 |
| LED Process |
 |
| Putting Solder on PCB |
 |
| LED being Soldered to Custom PCB in Toaster |
And here is a close up of the final soldered LED:
 |
| LED+PCB |
Although the soldering was smooth, the unsoldering process was not. Because of our lack of knowledge we were unable to unsolder an LED without burning out the diodes in the LED (because we had to have the LED in the oven 5+ minutes near it's maximum temp rating). We decided to stick with the original Star PCBs for the sub this summer. It saves us a lot of hassle and money. In the future (when we can buy the LEDs not connected to the star PCB) we will change our lighting design to incorporated this small, more effective PCB.
No comments:
Post a Comment